When illustrating how to play chords, scales, or any other piece of information on a fretted instrument, fretboard diagrams are quite helpful. There can be some confusion on how to interpret those diagrams, so hopefully this article will help clear things up. The vast majority of guitar related books and online resources will usually illustrate ideas with either vertical or horizontal diagrams like the ones below.
Vertical Diagrams
![]()
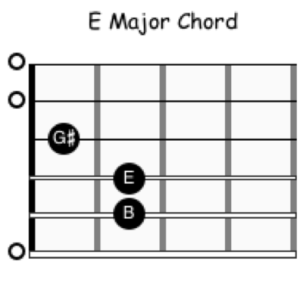
With vertical diagrams, imagine that you are looking at the guitar standing straight up and down (like it sits on a guitar stand). The vertical lines represent each string and read E A D G B E (6 – 1) in that order from left to right. These are useful for illustrating ideas that span only the distance of 4 – 5 frets.

Horizontal Diagrams
![]()
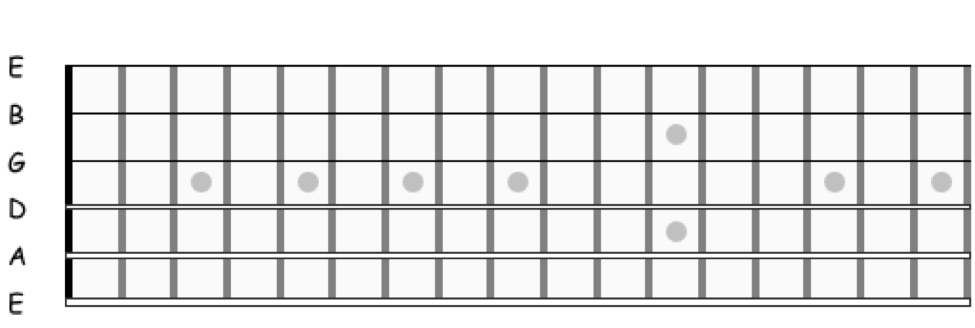
Horizontal diagrams offer the perspective of looking over your fingerboard with the guitar in your hands. The lowest string (6) is on the bottom, while the highest string (1) is on the top. These can work well for illustrating ideas that span only a few frets or that cover the entire fretboard.


Numbers
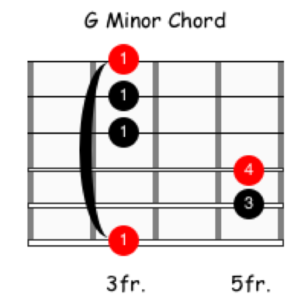
The numbers will most often represent which fingers you should use to fret the notes unless stated otherwise.
Fretting hand fingers are as follows: 1 = index, 2 = middle, 3 = ring, 4 = pinky.
Sometimes numbers can be used to illustrate scale degrees. Circles adjacent to the fretboard imply that those strings are to be played open. Avoid the string if there aren’t any circles on the fretboard or next to it.

Letters
Letters can be used instead of numbers to show what the notes are.
Other Symbols and Information
- The chord, scale, or arpeggio title will usually be at the top of the diagrams.
- A line across the fret connecting several notes most often represents a bar (when one finger covers multiple strings at one time).
- Numbers next to or below the fretboard will tell you which frets are represented in the diagram.
- Colored circles can be used to represent the root (or other important) notes.
Have any other questions? Comment or send us an email. Please share this post if you think others might find it helpful.
I remember seeing ‘X’s in addition to circles next to the fretboard to mark the strings that are not to be played.
Yes, the Xs can be helpful as well. I often add them for some of my students as a reminder not to play certain strings.
Thank you. Trying to learn on my own. Best information I have found.
Happy to hear that, Kevin! Thank you for your comment.