


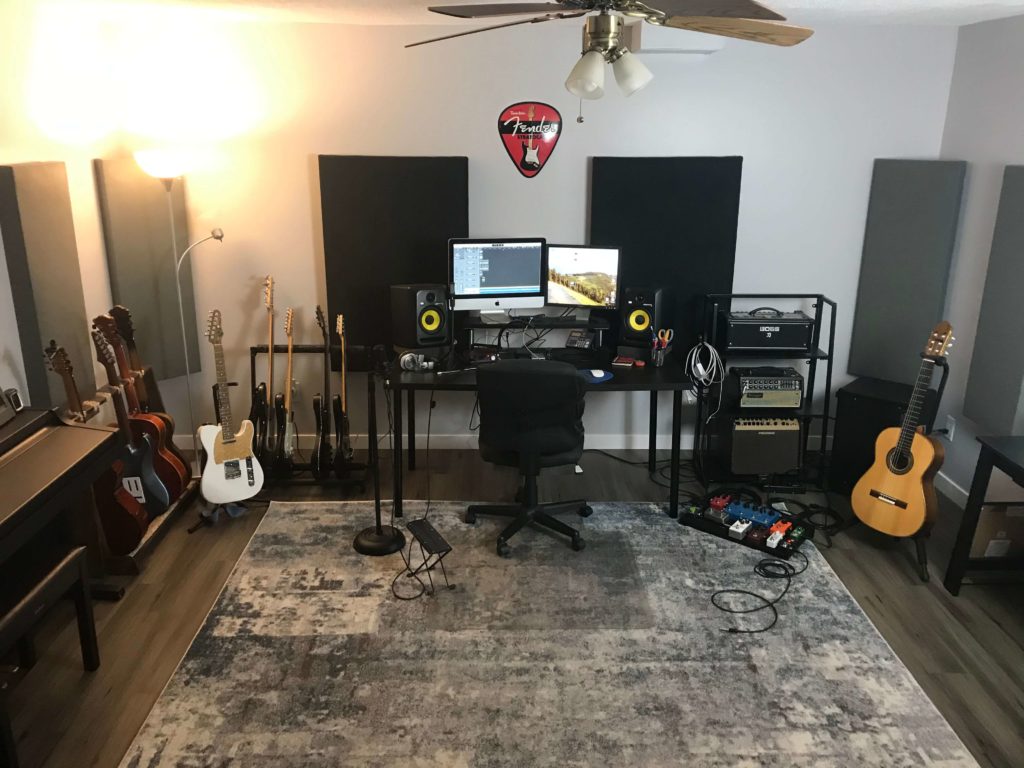

I recently purchased this home with the intention of making the basement space into a multi-purpose music studio. I first removed the carpet, painted, and laid down some luxury vinyl plank floors. I then added a rug to help with some of the natural acoustics of the room. Does it matter what type of floor you have? The truth is, not really. Hard surface floors or carpet – either can work. The main focus should be on the walls and ceiling.
Acoustic panels can cover a lot of surface area, and depending on the thickness, can be incredibly effective. Don’t expect to completely deaden the ambient noise in your room; that’s nearly impossible. You CAN, however, create a set-up that gets you very close to what you might see and experience in a professional studio. Check out our video to see the final product and hear the difference these panels can make.

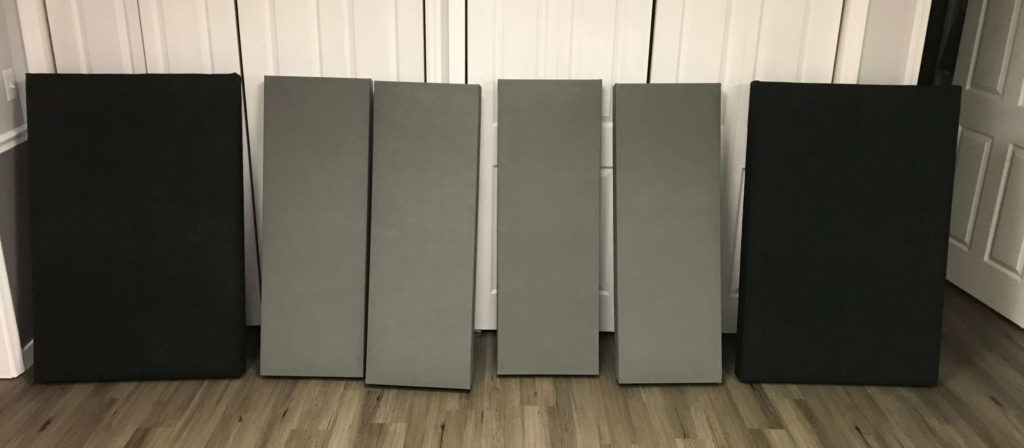
Here is some more information about what I used and how I created my own acoustic panels.
Materials
There are a lot of different materials and designs you can follow to create your own panels, but here is what I used.
- Frame: 1×4 basic lumber
- Absorbing Material: Rockwool Safe ‘n’ Sound Insulation (16″)
- Fabric: Slate Oly-Fun (Polypropylene) fabric from Hobby Lobby (and black burlap for the larger panels)
- Mounting: Various picture hanging brackets worked fine. Check the weight ratings. My smaller panels came in at around 10 pounds, while the larger panels are around 18 pounds. French cleats are also a great option.
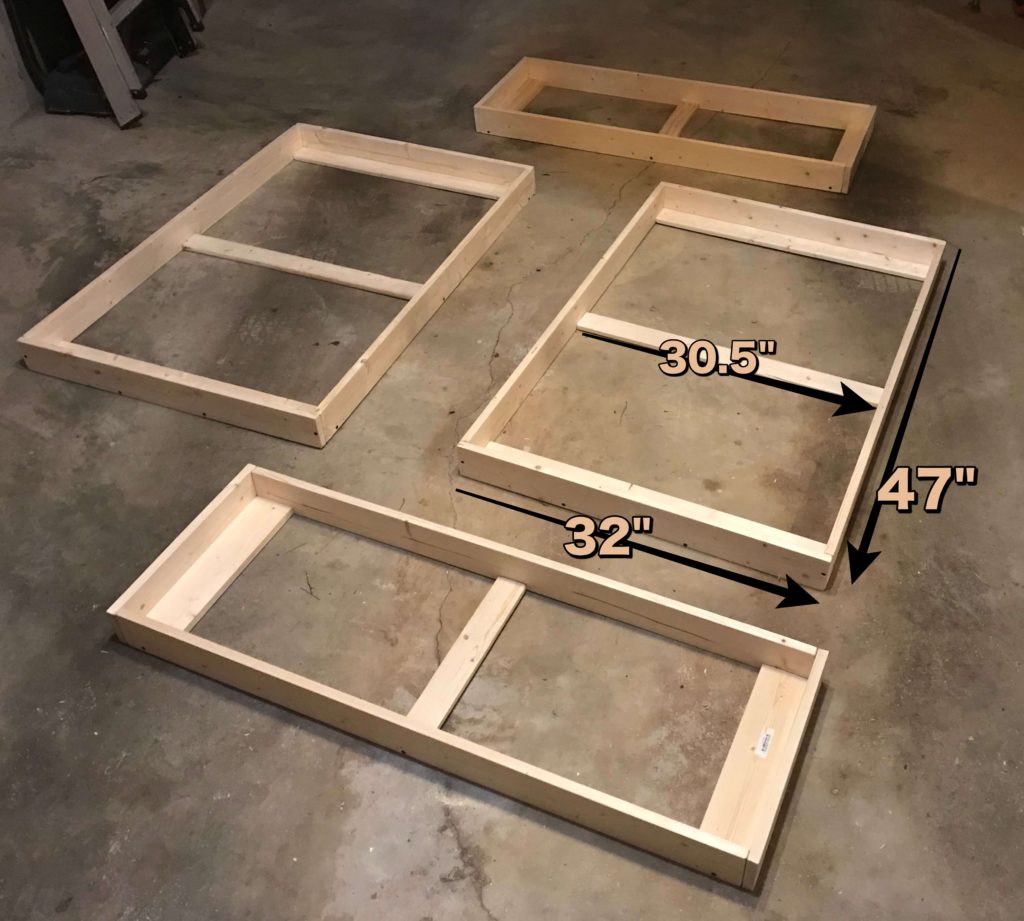
Building the Frames
I sized my frames so that I didn’t have to cut any of the insulation; it fit nice and snug in the boxes I created. The smaller frames each fit 1 panel of insulation, while the larger frames fit 2 side-by-side. I added extra support in the back at the tops and bottoms and in the middle.
- Since each sheet of insulation was 47″ long, I made my side pieces that length.
- The top and bottom pieces were cut long enough to cover the insulation and the ends of the long side pieces (16 3/4″).
- The 3 support pieces are cut the same width as the insulation (15 1/4″). I used a nail gun to tack the pieces together, then secured the frame further with wood screws.
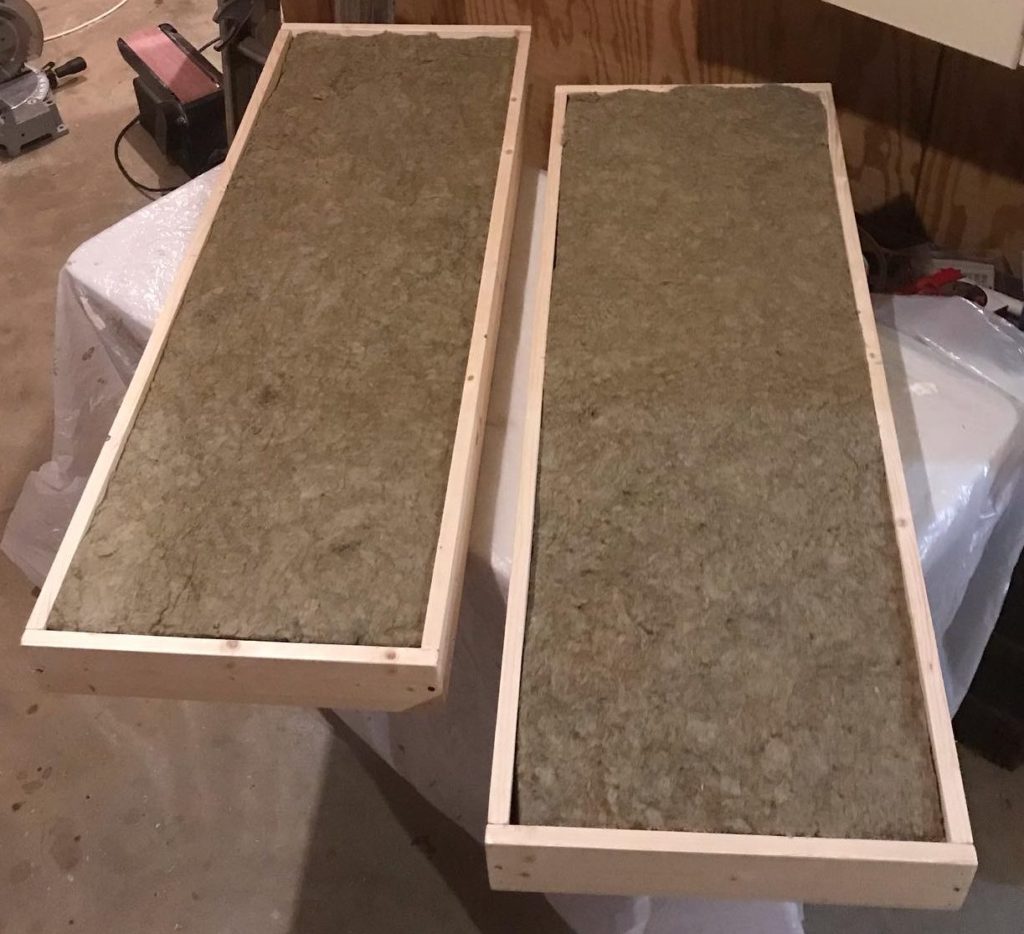
For the larger frames, I increased the width to account for the two sheets of insulation.

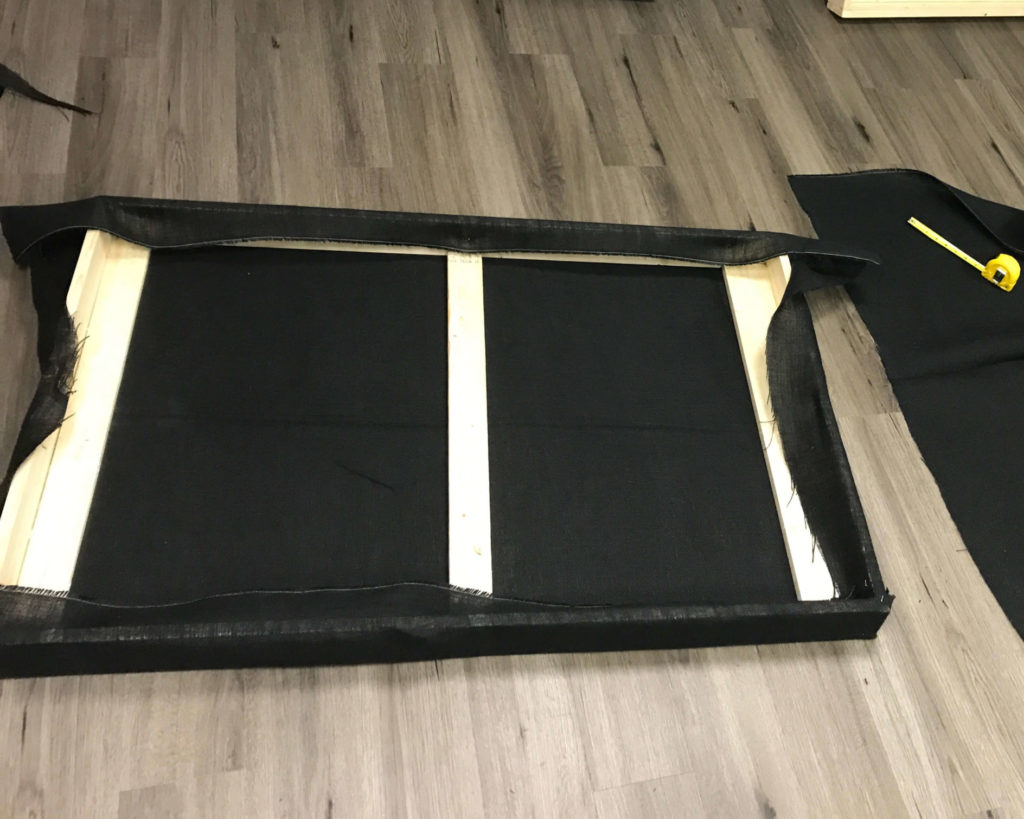
Fabric
Select a fabric that is breathable, meaning you can easily breath through it. The lest resistance you experience when trying to breath through it, the more acoustically transparent it will be. I used a material called polypropylene as well as burlap, though cotton or other poly materials can work. Nylon tends to sag when hung vertically.
Once you place the insulation, you can staple the fabric to the frame. I recommend having fabric on both the front and back rather than leaving it open on the back or closing it off entirely with a board the size of your box. This will allow the sound to pass through your panel, bounce back off the wall, and back through the panel for double the absorption. I stapled the back fabric before adding the insulation. Make sure to pull the fabric tightly as you staple.

My Costs
Here is what I spent building and mounting 4 small panels and 2 large panels:
- Lumber – $65
- Insulation – $52
- Fabric – $35
- Mounting Brakets – $15
Total Cost = $167

Where to Place the Panels
If you’re simply trying to cut down on excess noise in your practice room, place them on the bare walls where you think they’d be most effective. However, if you’re doing any mixing, you may want to follow these:
- Behind Your Monitors: Place panels behind your monitors to capture some of the reflection bouncing off the front wall. (Tip: try to keep your desk off the wall by a foot or so)
- Corners: Corners trap bass, so place some there as well. You can even make your panels thicker in the corners if need be.
- First Reflection Point:Find the first reflection points on your side walls. There are several ways to do this, but you can easily find some helpful guides if you search “finding first reflection point.”
- Cloud: You may want to add a “cloud” to your studio by adding some panels to the ceiling above your mixing area.
- Back Wall: Go a step further and place a few on the back walls directly behind you to capture the reflection from there.
- Windows can be a tough work-around, but sound absorbing curtains can help. If you are thinking of replacing your blinds as well, cellular (honeycomb) blinds are said to absorb more sound than other blinds.
If you have more questions about where to place your panels, check this video out.
I’m very pleased with how these turned out and the effect they have on my room. If you have any questions or thoughts to add, leave a comment below. Thanks for reading and watching and don’t forget to subscribe to our newsletter!